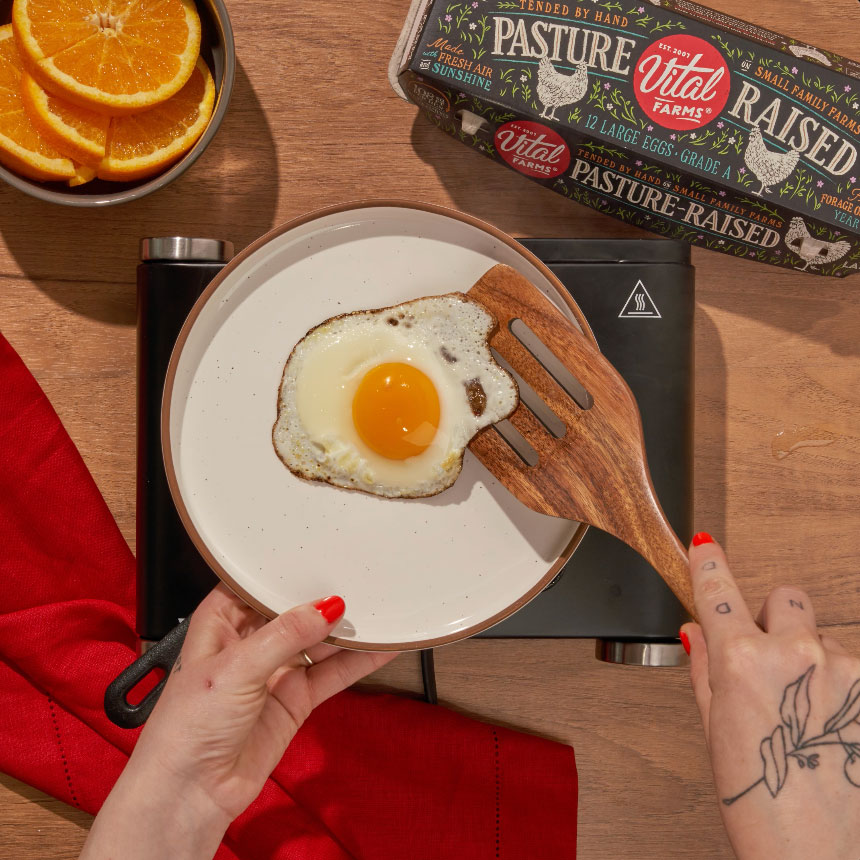
It’s no secret that eggs are tough to find right now. With Easter approaching, the high demand for eggs can feel stressful, especially for those of us who enjoy the tradition of dying and decorating eggs!
To help you navigate this spring’s egg hunt, we’re passing the baton to our grass-fed butter to give you 5 swaps for egg decorating this spring.
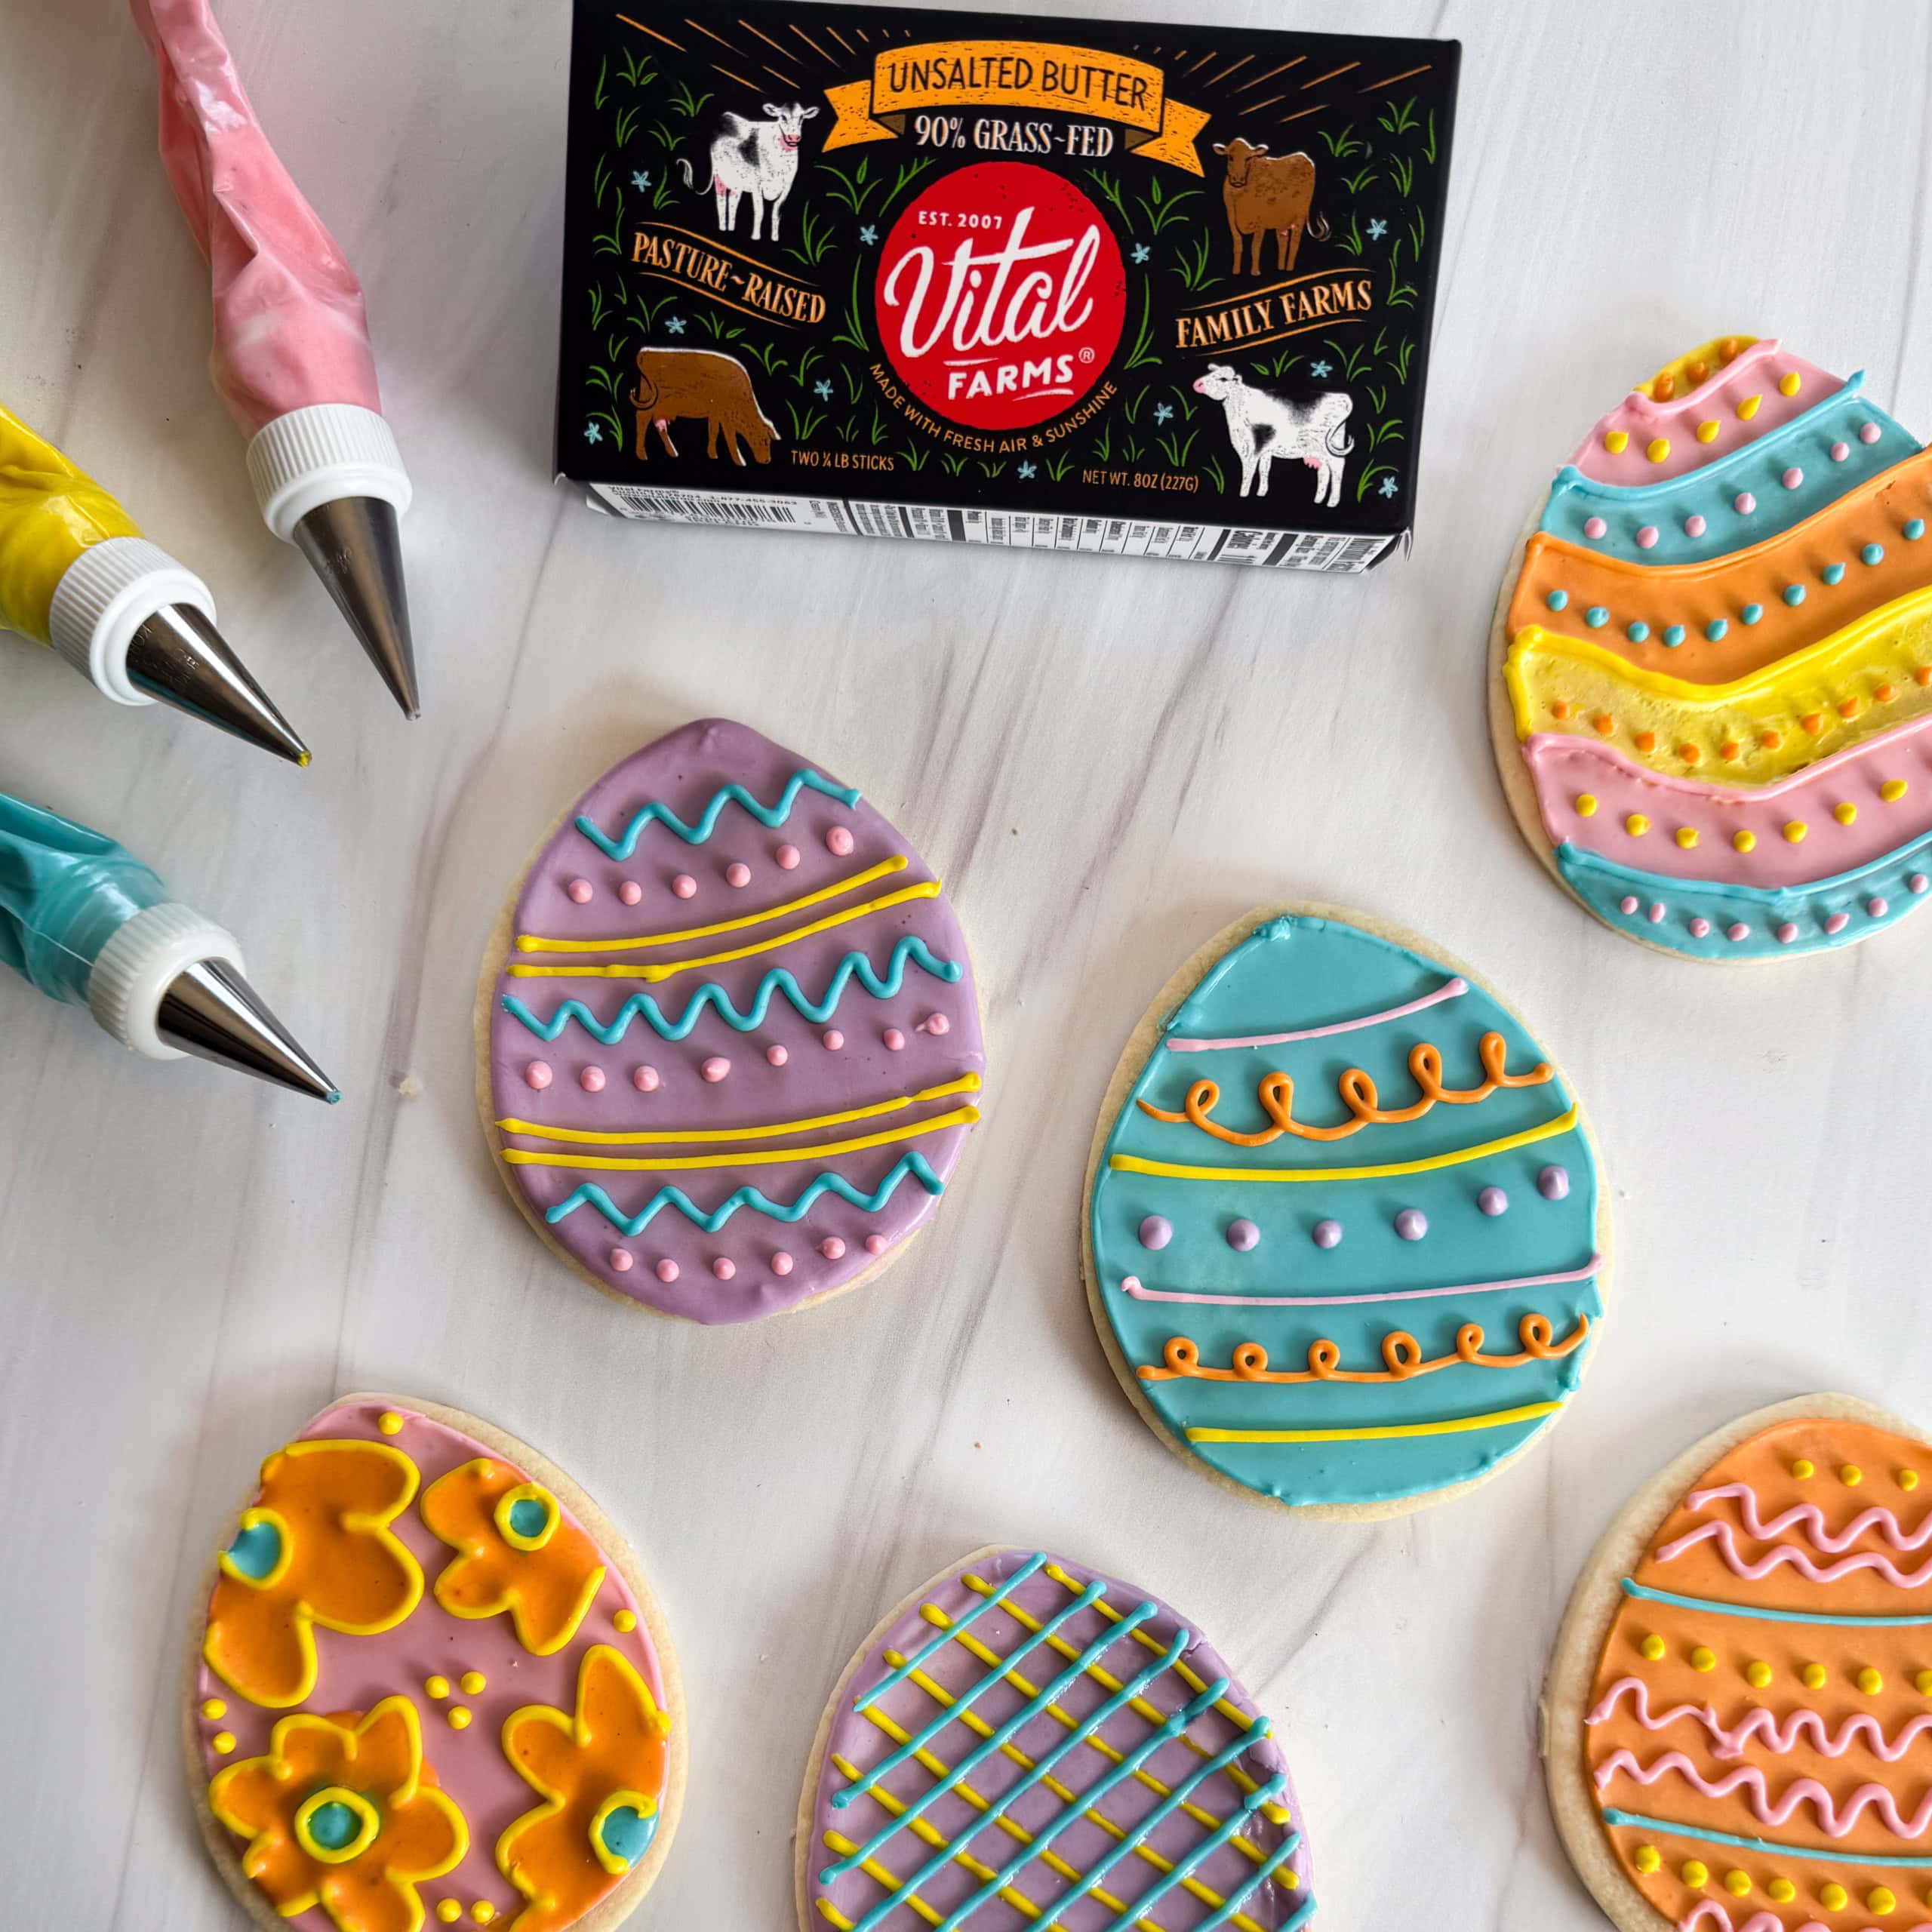
Easter Egg(less) Cookies
Looking for the classic kid-friendly Easter egg decorating experience? Sub our eggs with a box of Vital Farms Butter and create your own cookie eggs!
Ingredients
Cookies
- 3 cups all-purpose flour
- 1/2 teaspoon baking powder
- 1/2 teaspoon salt
- 3/4 cup Vital Farms Unsalted Butter, softened
- 1 cup granulated sugar
- 6 ounces cream cheese, softened
- 2 teaspoons vanilla extract
- 1-2 tablespoons milk
Icing
- 6 tablespoons warm water (plus extra for thinning)
- 3 tablespoons meringue powder
- 2 teaspoons vanilla extract
- 4 cups powdered sugar
Instructions
For the cookies:
- In a large bowl, combine the flour, baking powder, and salt. Set aside.
- Use an electric mixer to beat the Vital Farms Butter and sugar until creamy. Then, add the cream cheese and vanilla extract. Mix to combine. Add milk one tablespoon at a time until the dough comes together.
- Press the dough into a disk and refrigerate for at least one hour.
- Remove one disk of dough at a time and roll to 1/4-inch thick on a flour-dusted surface. Use an egg-shaped cookie cutter to cut shapes into the dough. Place the cookies on a parchment-lined sheet pan and repeat with the second piece of dough.
- Refrigerate the cookies for at least 15 minutes before baking.
- Preheat oven to 350°F. Bake one sheet of cookies at a time for 8-10 minutes or until lightly golden around the edges. Let cool completely.
For the icing:
- Combine the warm water, meringue powder, and vanilla extract in a large bowl. Whip with an electric mixer on high speed until frothy.
- Add the powdered sugar a little at a time. Whip for 8-10 minutes or until soft peaks form. If the mixture looks dry, add water, one tablespoon at a time, until it reaches a stiff-icing consistency.
- Divide the icing into bowls and add food coloring to each, beginning with one drop. Stir the coloring into the icing and place plastic wrap against the surface of each bowl to prevent it from drying out.
- Scoop half of each color of icing into a piping bags fit with a small round tip (#2 or #3) or use scissors to cut a small tip from the bags.
- Add a small amount of water to the remaining icing to thin it out for filling larger areas of the cookies.
- Get creative and decorate the cookies! Let dry for 2 hours before storing in a sealed container at room temperature.
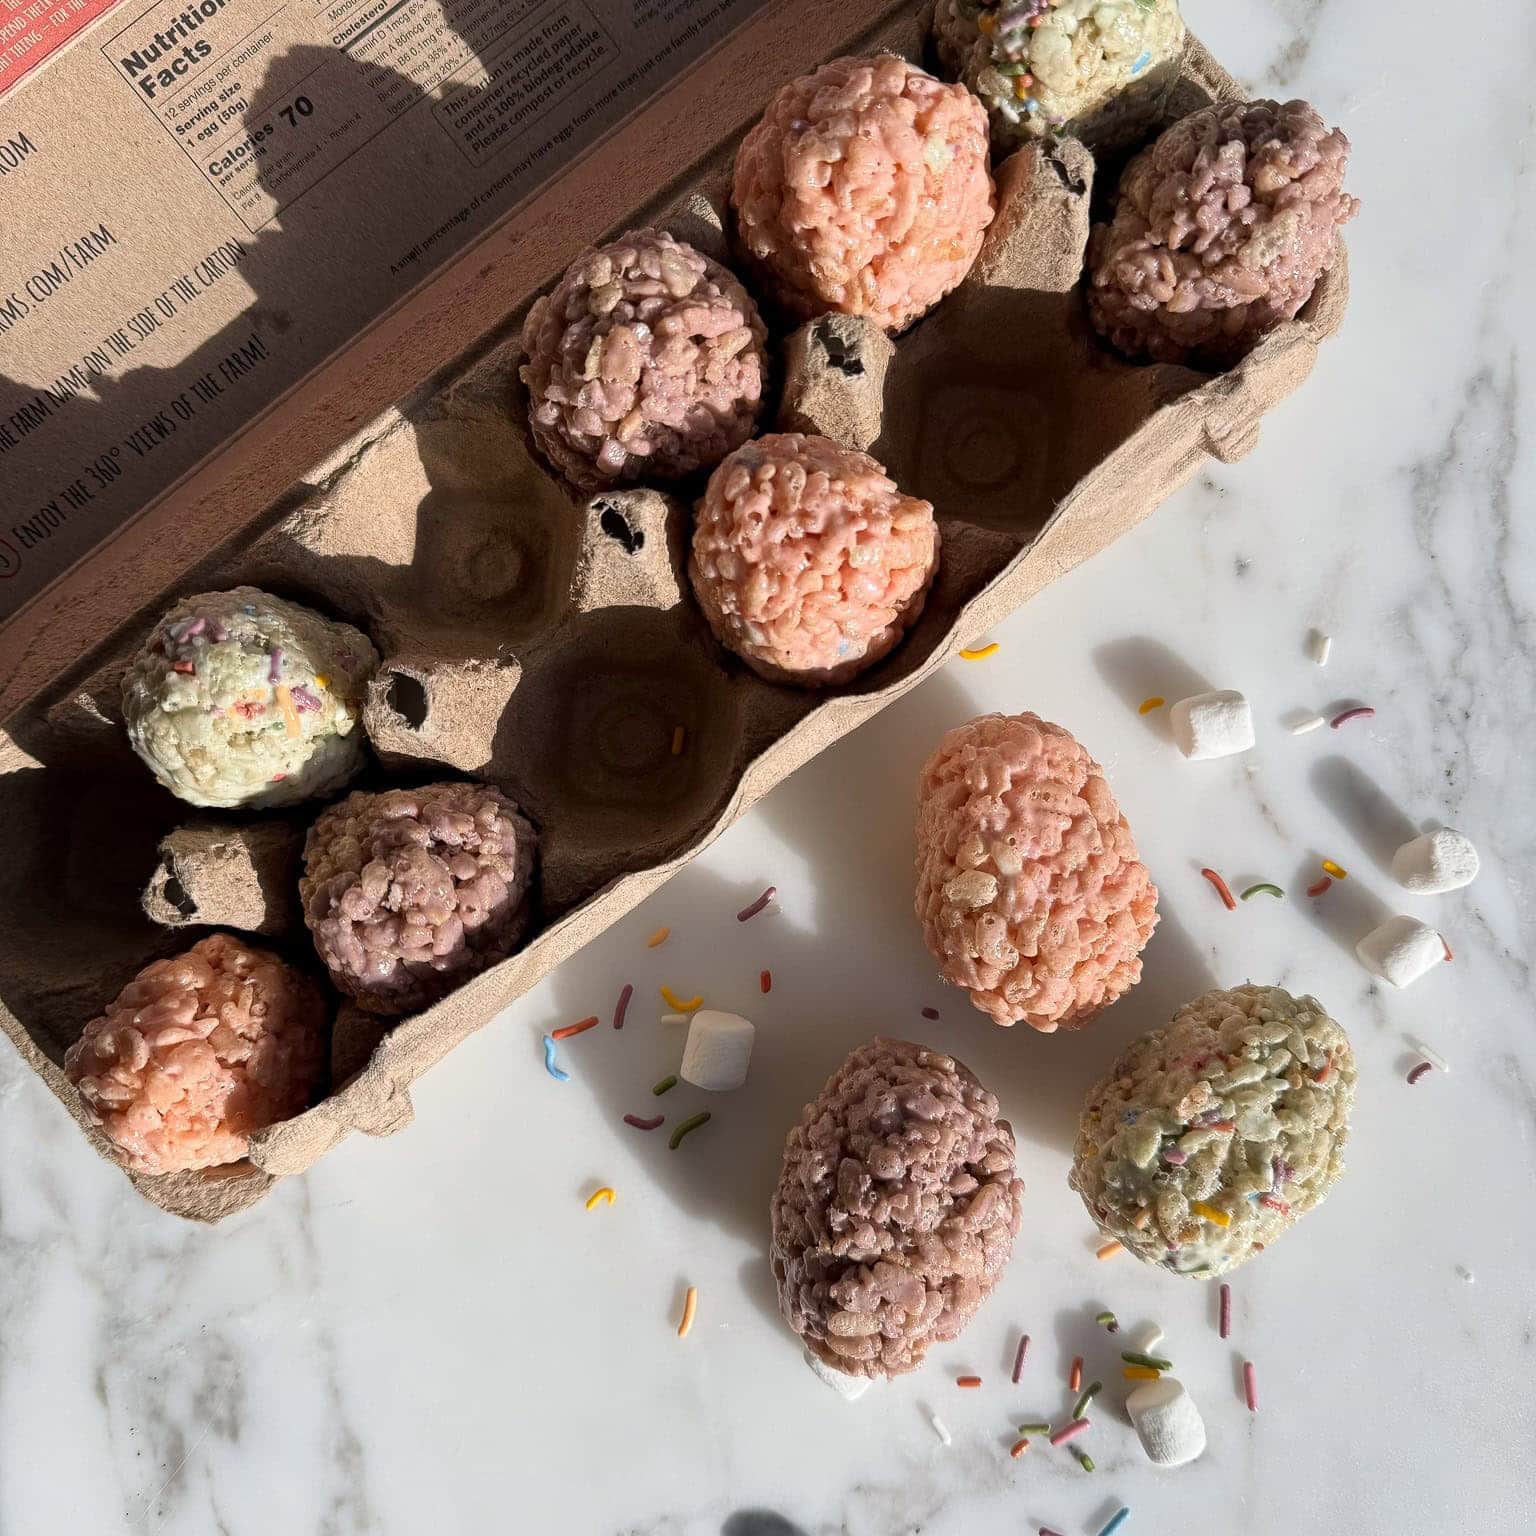
Rice Crispy Treat Eggs
If you're looking for a fun twist on a classic treat, try making these egg shaped rice krispie treats for your next spring gathering.
Ingredients
- 12 tablespoons Vital Farms Salted Butter
- 10 cups mini marshmallows
- 8 cups crispy rice cereal
- food coloring of choice
- sprinkles optional
- olive or avocado oil
Instructions
- Add the butter and mini marshmallows to a large, microwave-proof bowl. Microwave for about 1-2 minutes, until marshmallows and butter are just melted.
- Working quickly, divide the mixture up into 4 bowls (you can use the large bowl you microwaved the mixture in as one) then add your food coloring of choice to each bowl. Stir to distribute the color then add 2 cups of cereal to each bowl and stir until mixture is cohesive. You can also add sprinkles to any of the mixtures at this time, if you’d like as well.
- Generously grease your hands with some oil and scoop about 1/4 cup portions of the mixture into your hands, shaping into an egg shape. Set aside on a plate or baking sheet to harden completely. Repeat with the rest of each color of rice crispy treat mixture.
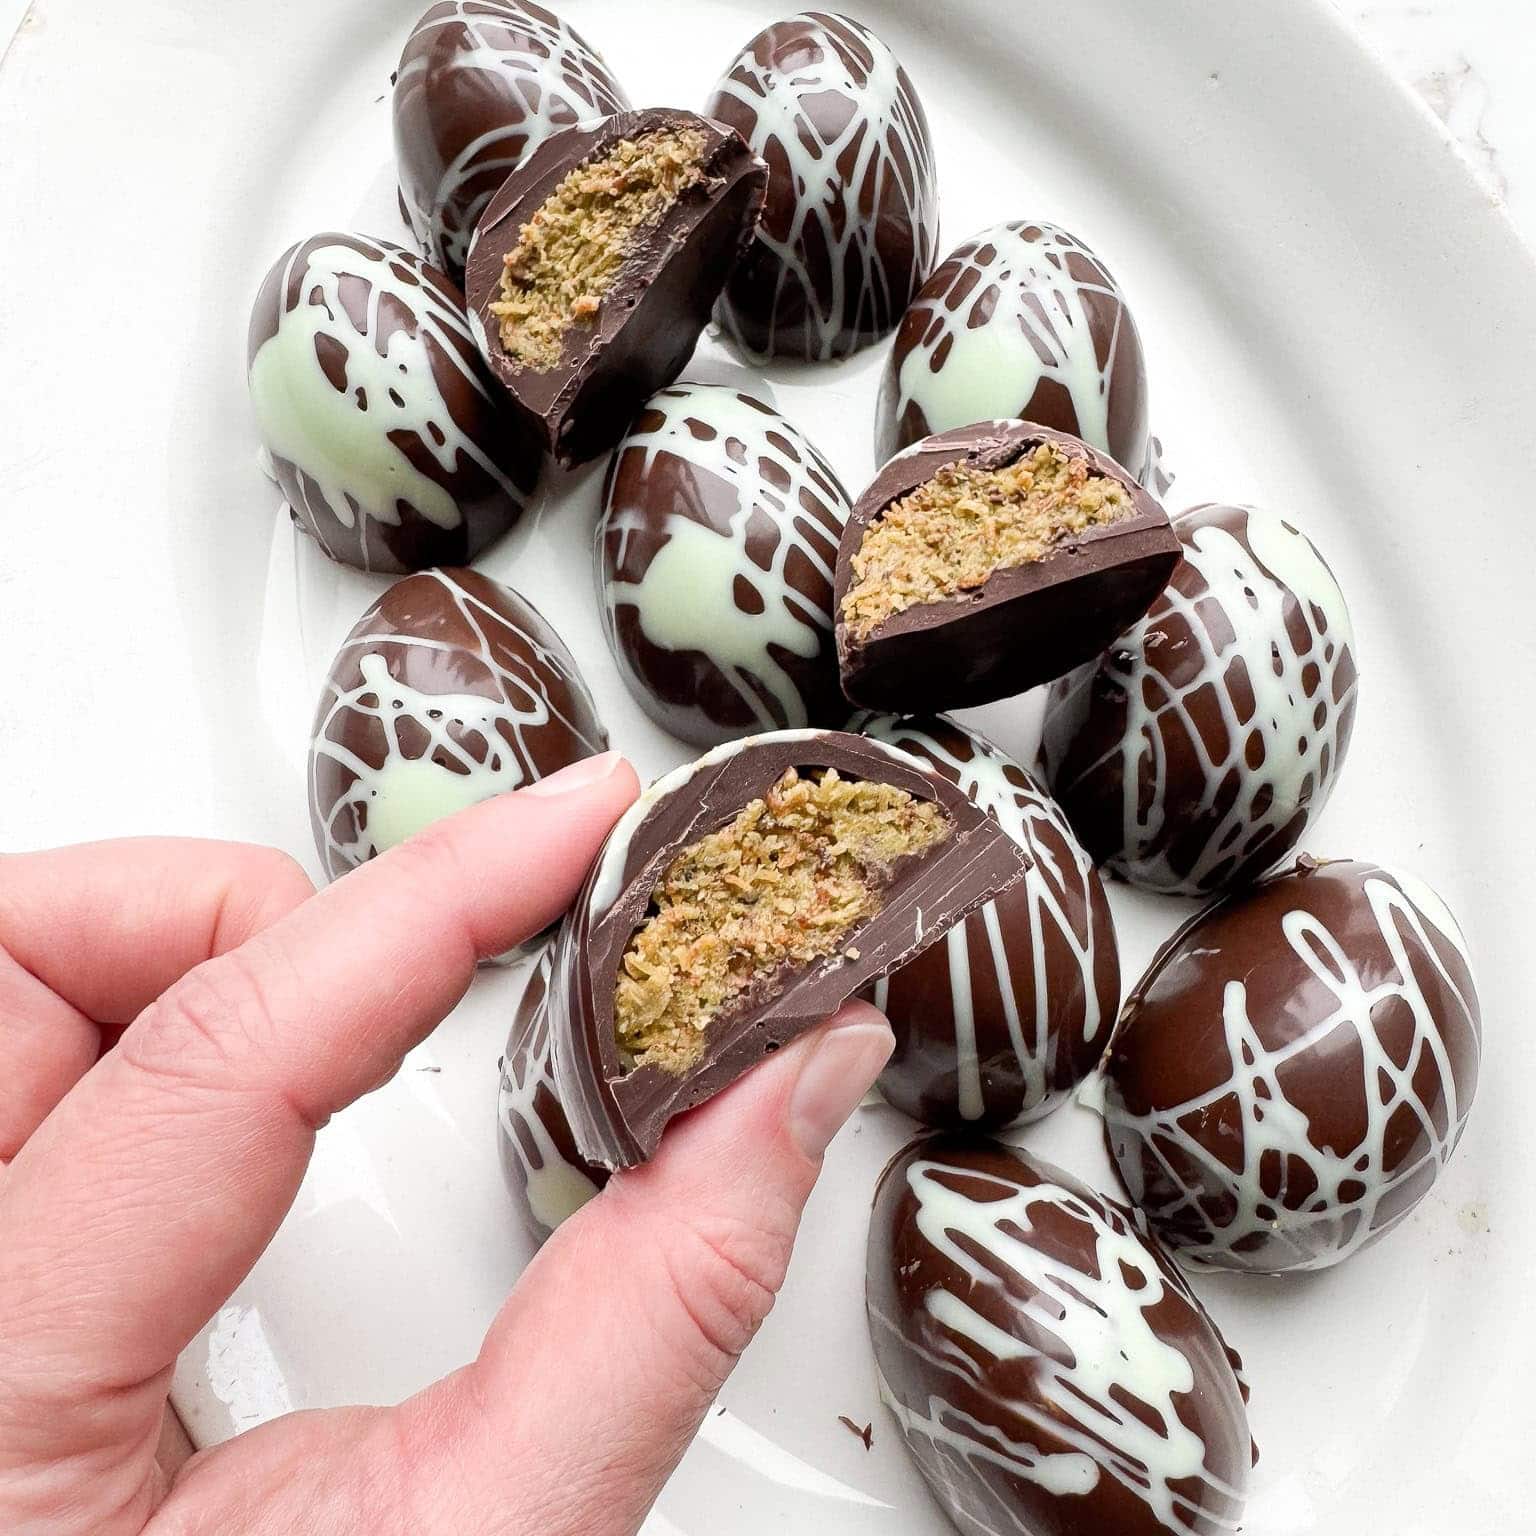
Dubai Chocolate Eggs
We took the viral Dubai chocolate bar filled with a crispy pistachio filling and turned them into egg-shaped treats for spring!
Ingredients
- 1/4 cup white chocolate chips
- green food coloring
- 2 cups dark chocolate chips
- 4 tablespoons Vital Farms Salted Butter
- 1 1/2 cups kataifi pastry, roughly chopped
- 1/2 teaspoon vanilla extract
- 7 ounces pistachio butter
- silicone egg shaped molds
Instructions
- Add the white chocolate to a small, microwaveable bowl. Microwave in 30 second increments, stirring each time, until melted. Add in a drop of green food coloring. Drizzle a little into the bottom of each mold cavity to create a design.
- Add the dark chocolate chips to another microwavable bowl and microwave in 30 second increments, stirring each time, until melted. Add a few teaspoons to the bottom of each mold and spread evenly with a spoon to coat the bottom and sides. Place in the fridge to harden.
- Add the butter to a skillet over medium heat and melt. Once melted, add in the kataifi pastry and toss to coat evenly in the butter. Continue to let the pastry toast, stirring often. Once golden brown, transfer to a bowl.
- Add the vanilla and pistachio butter to the kataifi mixture and toss to evenly combine.
- Take the egg shells out of the fridge and fill each with some of the filling, leaving about 1/4-inch of room at the top. Top each with remaining melted dark chocolate to fill. Place back in the fridge to harden completely before removing from the molds and eating.

Buttery Easter Bunny
There's only one thing better than a chocolate easter bunny, and that's a butter easter bunny! Mold Vital Farms Butter into a festive bunny for your Easter dining table, or gift it to a friend with a loaf of sourdough bread.
Equipment
- Silicone or metal mold
- Knife, spoon, or frosting spatula
Ingredients
- Vital Farms Salted Butter
Instructions
- Line the bunny mold with plastic wrap.
- Press butter into the mold. Close and refrigerate overnight.
- The next day, carefully open the mold and remove the butter bunny.
- Wrap it up to gift to a friend, or spread directly on warm toast.
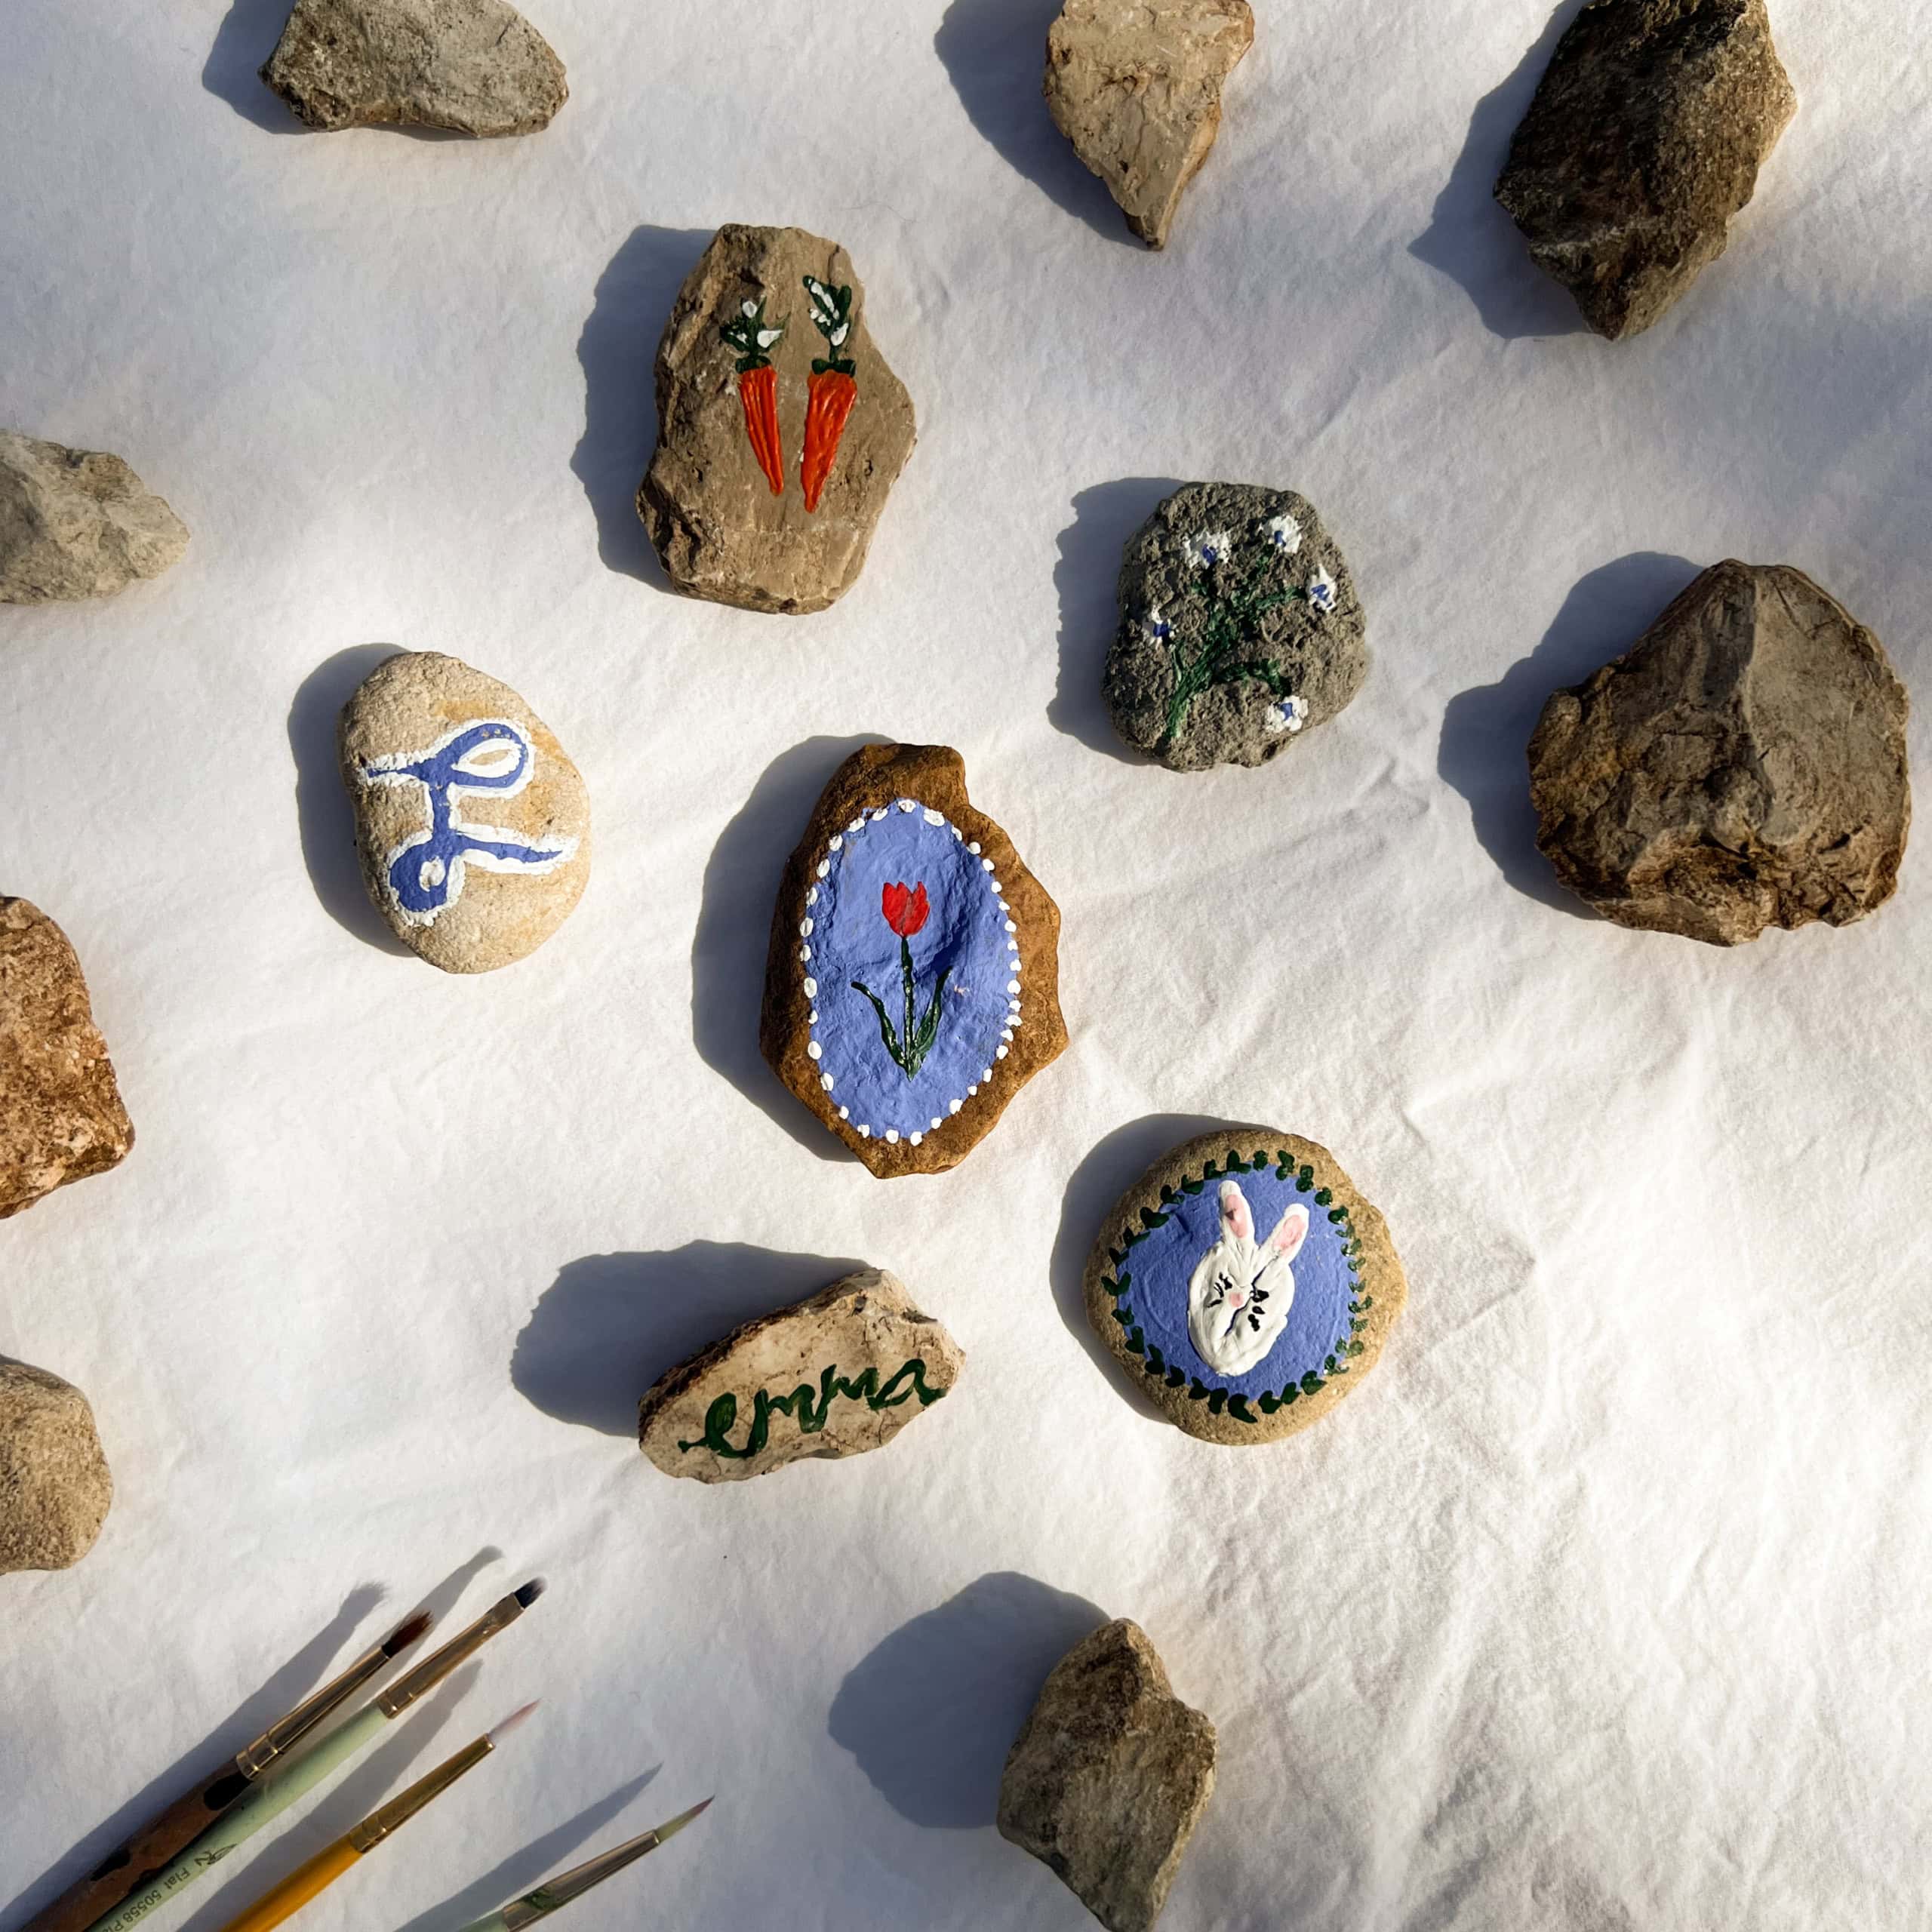
Painted Easter Rocks
We'll admit, there's no butter used in the making of these painted Easter rocks. However, we couldn't leave this craft off the list. Get creative with shapes, designs, and colors. Then, put them to use in an egg hunt or your spring home decor.
Materials
- Collection of smooth egg-shaped rocks
- Acrylic Paint
- Paintbrushes
- Scrap paper, cardboard, or surface to paint on
Instructions
- Gather your materials.
- Prepare the rocks by washing and cleaning any dirt off them.
- Brush paint onto the rocks and add your designs.
- Let dry completely before using for an egg hunt or decoration.